
Dar Corrigan is a Master Gardener and a member of Halton Region Master Gardeners since 2018. Prior to that, Dar lived a very urban and transitional life, moving between three countries over the past two decades. She now raises her family and gardens at home in Oakville. Her current gardening interests include indoor kitchen gardens. She continues to take courses in horticulture and learn on the ‘job’.
The following blog post is part two of a three part series.
Hello again, gardeners! This is a follow up to “Setting Up an Indoor Veggie Garden” posted in early January. I sincerely hope that it inspired at least a few new gardeners to give the indoor veggie garden a try! In this article, I will go over a few more tips and tricks to get the most of the indoor set up.
Seed Selections
It is a very good idea to be realistic in seed selection. Remember, we are growing in shallow pots, and plants must be suited to these growing conditions. Still, it is surprising what the internet will tell you that you can grow indoors.
Admittedly, I tried a bunch of different things and I am sure that with lots of experience and all the right equipment and technology it is possible to grow tomatoes, potatoes and cucumbers indoors, but for the beginner, I highly recommend sticking to lettuce and lettuce blends, herbs and microgreens (at least until you have a growing season or two under your belt).
For one thing, bigger plants require bigger pots, which take up more space and require more light installations. They also can quickly take over your house, becoming both unsightly and a magnet for insects.
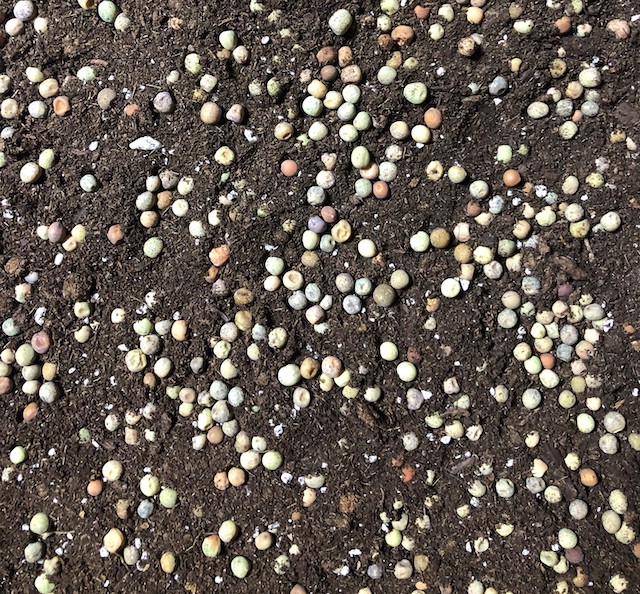
Not to worry though! No one should feel deprived by these parameters. There are so many options that fall under lettuce blends, herbs, and especially microgreens! At the moment, in addition to my lettuces, kale and herbs, I am growing microgreen pea shoots, sunflower seeds, beets, arugula and broccoli. Moreover, many microgreens pack a mega nutrition punch and grow incredibly fast (in some cases fully grown in two weeks), making them a great choice for the indoor garden. Sheridan Nurseries is now carrying a variety of Westcoast Seeds microgreens (a British Columbia business). See also William Dan Seeds located just outside of Dundas.

Seeds – Planting and Labelling
When planting seeds, do pay attention to planting instructions on the seed packet. That being said, for some strange reason, that information is often missing. I have noticed this especially with microgreens. So, when the information is missing, or in doubt, my suggestion for microgreens is the following: spread seeds densely on the soil surface and cover seeds very loosely with a small amount of additional soil.
Microgreen seeds should be spread densely for harvesting purposes (not spaced like ordinary seeds). Microgreens are grown to be harvested quickly, and at relatively short heights. As such, they do not need to spread out and we do not need to leave them room for root development. Therefore, make the most of the tray and pack them in for a generous harvest! And when it comes time to harvest, it is much easier to grab bunches at a time when they have been densely planted, making just a few cuts with scissors (rather than cut each individual stem, which can be a tedious process).
Finally, do make notes of planting dates and seed type. This will help immensely in your development as an indoor gardener – allowing you to plan and learn from what works best in your home. It will also take a lot of guess work out of the job. With the pandemic raging on and everyday feeling like Blursday, little date markers can help with a sense of time and bring perspective.

Managing Soil
In the first posting, I wrote that quality seed starting soil is strongly recommended for the indoor veggie garden. Not only is that true, it is also important to point out that the soil needs to be turned over regularly. Personally, I ‘recycle’ my soil every two harvests. By ‘recycle’, I mean that after harvesting a first or second batch of produce, I dump the soil somewhere in my outdoor garden beds. The next planting will get fresh soil as the best of the nutrients will have been absorbed by earlier harvests.
Of course, this is not a hard and fast rule. I did not do this my first year growing indoors over the winter. The seeds still did germinate and lettuces grew, but they were noticeably less robust and flavourful as the winter wore on (did I mention that I was brand new to indoor gardening?). Now that I turn over the soil at least every two harvests, I see and taste the difference. My lettuces are most definitely bigger and stronger. My microgreen pea shoots are sweeter. In my opinion it is a game changer.
Miscellaneous
Small things can make a big difference, such as investing in a good quality spray bottle. Seriously. There will be a lot of misting! You want to make things easy and enjoyable.
Pots and trays should be chosen wisely. While you may want to use whatever you have lying around to get started, some choices make for easier indoor gardening over the long run. For example, lighter pots are ideal. Avoid clay and other heavy pots (they may threatened the integrity of your set up).
Rectangular trays with a fitted dome are an inexpensive but worthwhile investment (around $6). Rectangular trays are easy to move around and the fitted dome makes the germination process smoother by keeping by soil most and allowing one to be less vigilant with misting. The seeds and soil cannot be allowed to dry out during the germination process. The dome comes off when the seedlings start to grow.
To some people, looks matter. If possible, give some consideration to appearances when designing for function. After all, this structure may be in your home all winter long (and you may not be leaving the house!). The good news is that there are ways to keep it tidy looking without spending too much time or money. For example, choose all one colour for pots, or paint the outsides the same colour to keep a uniform look. Keep the shelving all one style, and vertical. Or if all else fails, stick it in the basement and out of sight!
Get a timer for the lights. I mentioned this in the last post and it really bears repeating. It will make life much easier. We all forget to turn them on and off. Don’t stress yourself or your plants out.
Do not bring outdoor plants in to reside with the indoor veggie garden. This is a big no-no! In fact, keep them very far apart from each other. While it may seem selfish to hoard all the artificial lights for the veggies, any other household plants or plants brought in from outdoors might bring bugs to invade your vulnerable indoor garden. Keep them separate!
- Sopping wet soil – over watering
- Stop. Mist germinating seeds and new plantings. Don’t drown them out.
- Once the plants are established, begin watering from the tray allowing the plants to drink from their roots.
- Soil drying out. Don’t let this happen.
- Mist regularly and dome (ideally) while germinating
- Consider location – is it by a heat source that could be drying out the soil?
- Too much/too little light?
- Put it on a timer and give yourself a break.
- Tiny insects
- Sticky traps may help. See here.
- More than that (a few tiny insects), you may have a problem. Check the quality of the soil. Make sure any other household plants aren’t spreading trouble.
- Failed crop
- This should not happen often. Check seed packet for expiry dates and growing information and start over if seeds have not germinated sufficiently past the timing on the information packet. I ended up throwing out the entire package of seeds (a $3 loss) after a failed crop. Life is too short to wait for bad seeds to grow!
Concluding Thoughts
I hope these tips are helpful and that more people are encouraged to grow veggies indoors this winter. I for one am having a great time and am still learning as I go.
If these posts have piqued your interest, and you are thinking of what it takes to provide a steady stream of green produce for your family, then stay tuned! In my next posting, I will share what I have been doing to keep my family of four in salads and then some!
Dar Corrigan, Master Gardener, Halton Master Gardeners